
|
|
Stud.IP Dokumentation
|
Changing your scheduleIf you have not yet designated course appointments and have also not yet used the Schedule wizard, no schedule exists for the course yet. How to use the Schedule wizard is described in detail here. Here you can (also retroactively) set new appointments, change or delete them. Manually scheduling course appointmentsTo manually schedule a course appointment, please click on the Manually schedule course appointments button. You are immediately transferred directly to the Editing course appointments window. Editing course appointmentsTo edit a course appointment, click on the arrow 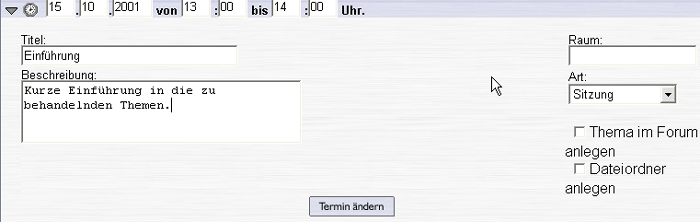
In the Editing window for a course apointment you first see fields on the header bar for the entry of the
of a course appointment. If you used the schedule wizard for scheduling, entries have already been made here.
you can enter a name for the course appointment. It should be short, precise and concise for the exact
of what should take place on this course appointment, the larger field below it is also available for your use.
you can specify the course room. However, this is only necessary if the course will sometimes be conducted in a room other than the one that you have already specified in the basic course data (step 1 of the Course wizard).
allows the specification of the type of course appointment. You may choose from the following: session, preliminary discussion, test, field trip, other appointment or special session.
To schedule the course appointment in this manner or to save the entries made, click on ––––> Deleting course appointmentsTo delete one or more course appointments, click on the Course appointment overview page (which shows the complete schedule) in the box at the end of the line containing the course appointment to be deleted. Subsequently, a checkmark appears in the box. Thereupon the course appointment has been marked for deletion. It will only really be deleted if you click on one of the buttons ––––> which you see at the beginning and end of the Schedule.
| ||
| |||

 at the beginning of the line. The individual course appointment will then be opened and can be edited.

