
|
Stud.IP Dokumentation
|
Reference and link listsYou can manage the reference and link lists in Stud.IP very easily. Please enter your course via the My courses selection item Select the References tab in the Course area. –-> You now see to entries as subitems: All references and Edit references/links.  Due to space constraints we have not yet written additional entries for the link collection — whenever you have to manage references, you can also adapt the links. Due to space constraints we have not yet written additional entries for the link collection — whenever you have to manage references, you can also adapt the links.Please click on Uploading/Editing references. You now see two large, empty text fields, one for references and the one below it for links — you can enter your references and link collections in them. The system allows for paragraphs; you can thus configure the lists clearly. If you already have literature or links in digital form, you can insert them comfortably — proceed as follows to do this:
Now click in the field for references or for links and enter the text:
 You can use this procedure for all the text input fields in Stud.IP! You can use this procedure for all the text input fields in Stud.IP!Click on the following button to save the changes: ––––> Reference management Reference management allows you to do reference research and to compile your own reference lists. One of the first contact points for this is the information box on the right side. ––-> Click on “Reference search" to search in the connected catalogues or on ”Enter new references“ to make entries on books for your reference list. You also have the option of searching for references in the reference list which has been set up in Stud.IP as well as in the linked library and regional catalogues. For more information see below. Every registered source is stored in the Stud.IP database with a specific set of metadata (Dublin core). In addition to the option of entering data yourself, it is also possible to search through external library catalogues (e.g. the OPAC of the SUB). In this case a link is stored in the external library system so that the bibliographic information or availability for interlibrary loan can be easily checked. References to these sources can be organised in lists. This option exists for every user, but such a repository also exists for every course or institution. If such a list is made visible, an appropriately formatted list is output — either to one's personal homepage or in the Reference area of a course or institution. All visible lists can be copied into one’s own personal reference area. Setting up and editing reference lists To set up a new reference list, click on the arrow next to your name. In the field, which is now open, you see the following: ––> Click on Attach:unknown_01.gif Δ. In the newly opened field you can now assign a title for the list as well as record data on the first title. –-> You should not be irritated by the asterisk and the percent sign; they only serve to format the text (asterisk = bold type; percent sign = italics). Simply enter the author’s name, the title, and place and year of publication between the respective braces. Now you can decide whether only you or other visitors to your homepage are to see the reference list: To do this select YES or NO under the "Visibility of the list" and click on Attach:unknown_02.gif Δ Δ to save it. If everything went well, the reference list is now on your homepage: –-> Digression: Formatting reference lists Each list can have its own individual formatting. All Stud.IP rapid formats can be used: the metadata is placed in branches. Example: Inputting "A great title" instead of dc_title and 1999 instead of year in the field **{dc_title}** ({year}) results in A great title (1999) In addition, it is also possible to only blend in certain data when they also exist. The vertical bar | is used for this (to generate it, press the following keys on your Germany keyboard simultaneously: [ALT GR] und [<>](next to the Y).) Example: [=**{dc_creator}** |({dc_contributor})|] results in Author (additional authors) if additional authors exist, otherwise only Author. The following data can be blended in::
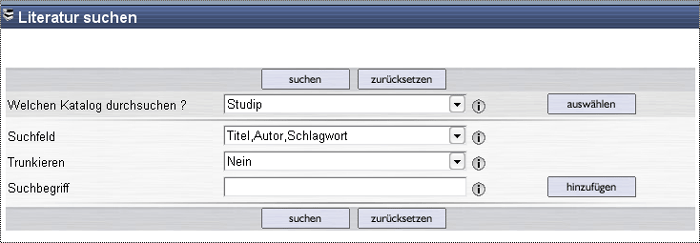
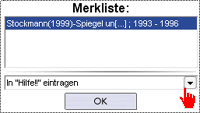
Registering references Use the input mask to register references. The small exclamation points behind the individual entry terms provide you with assistance if you have no idea what a term means. You do not have to fill in all the fields. Searching for references and entering them in reference lists  Use the search mask initially to select the catalogue which is to be searched through. Select a search field (e.g. title key word or author’s name), enter a search term and click on  Please enter only one search term per field! You can add additional search fields with the button; the former can then be linked with and/or. Please enter only one search term per field! You can add additional search fields with the button; the former can then be linked with and/or.If Stud.IP found something corresponding to your search term, the results are presented in a hit list.  With a click on the exclamation point (highlighted in red) the literature is added to your watch list in the information box at the right screen margin. To insert the newfound source into an existing reference list, click on “Edit reference list” in the information box. You now again see the lists which you have set up. Below your watch list there is now additionally a selection menu which can be opened.  Now mark one or more entries on your watch list and select a reference list from the menu below it to which you desire to add the literature. Then click on
| ||||||||||||||||||||||||||||||||||||||||||
| |||||||||||||||||||||||||||||||||||||||||||