

|
Stud.IP Dokumentation
|
Changing basic dataIf you desire to change the basic data of an existing course, the process is analogous to setting up a new course. However, the subareas are distributed across several pages; thus, there are the basic data, the course times, the schedule and the access permisions. On this page you can manage the basic data. In the first section you see the following input boxes: StructureThe page consists of four areas (Basic settings, Institute, Personnel and Descriptions), which you can click on and then edit. Initially the first section “Basic settings” should be open. Basic settings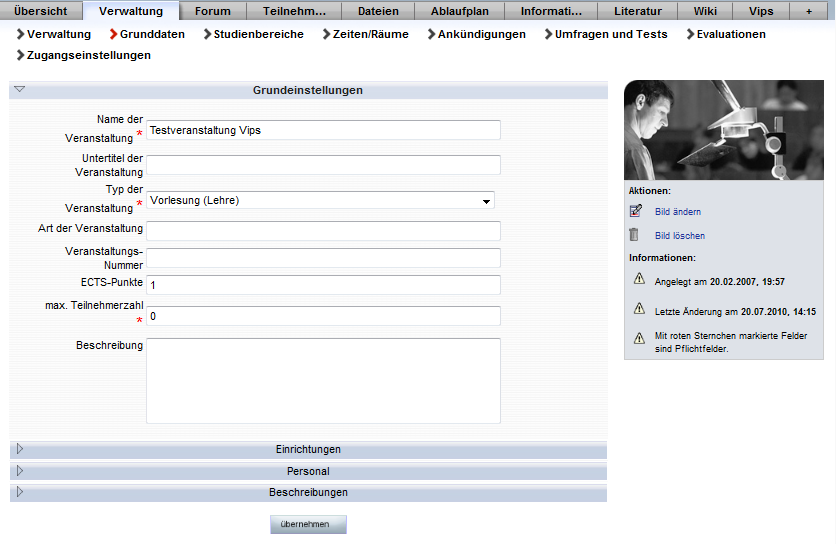  Please take note that you indeed do not have to fill in all the fields, but you must at least fill in the boxes which are printed in bold type. Please take note that you indeed do not have to fill in all the fields, but you must at least fill in the boxes which are printed in bold type.In the following the meaning of each field will be explained:
2. Now please enter the type of course, e.g. colloquium, lecture, seminar in the Teaching area, committee course in the Organisation area, etc.  In some cases you can only change the type of course within the category (for example teaching, work group or organisation). This is due to the fact that a course has been definitively assigned to this category when it was set up, and a subsequent change may involve a good deal of effort, which we would like to help you avoid here. If you should have trouble with the classification, please contact your administrator. In some cases you can only change the type of course within the category (for example teaching, work group or organisation). This is due to the fact that a course has been definitively assigned to this category when it was set up, and a subsequent change may involve a good deal of effort, which we would like to help you avoid here. If you should have trouble with the classification, please contact your administrator.3. Type of course: Here you can provide more specific information. If you, for example, specified "basic course of studies" under “Type of course”, you can now enter whether it is a lecture or an undergraduate seminar You can be extremely creative in stating the entries in this field because they only serve to further describe the type of course. 4. Enter the Course number under which the course is also listed in the university's Course Catalogue. 5. If it is a course in which students can obtain credit points, please state how many “ECTS points” will be given for successful participation in the course. 6. . Enter the Number of participants. On the one hand, the number of participants only provides information; on the other hand, this number also effects a restriction of the number of participants if you have activated that option. 7. Please state in which Room the course will take place (e.g. ZHG011, VG415, etc.). 8. In the large Description field please enter — in a manner similar to that used in a university prospectus — a description explaining what kind of course it is. Institute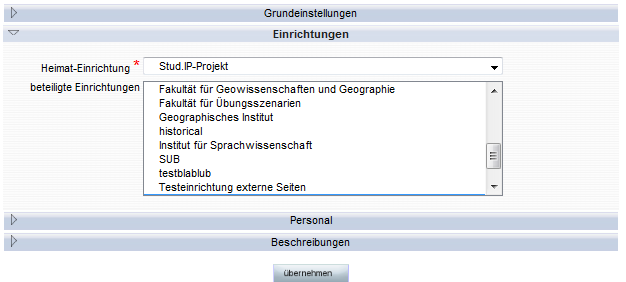 9. Select your Home institute from the list. Generally, the correct entries have already selected. The list opens up when you press the small “down arrow” button. If you are a lecturer at only one institution, you can only select this option. If your institute is not on the displayed list, please contact your institute’s administrator. 10. If Additional institutes are participating in the course, you can now also enter them. PersonnelIn the following section you can alter the participants in the course and the outside access (please note that you do not have this option if you are only listed as tutor of this course): 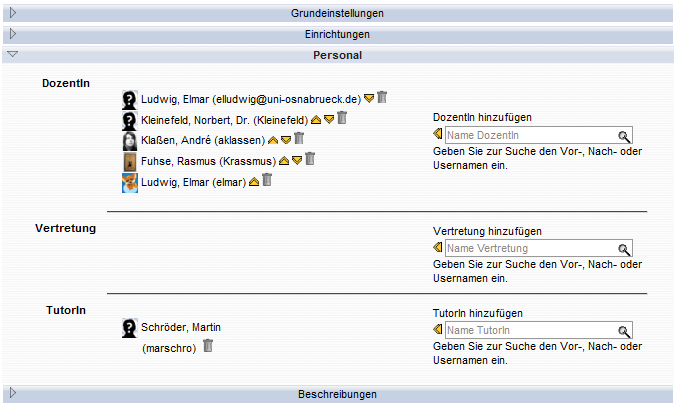 1. Course lecturers Now please specify the course lecturers. Normally, that will be you yourself. If there is also a co-lecturer press and hold the CTRL key (on your keyboard at the lower left) while you click on the second name on the list. 2. Substitute (only if globally activated!) People acting as "substitutes" therefore have the same permissions as lecturers, but are not visible as participants. Actions such as uploading of a file or setting an appointment in the schedule are still designated with the name of the primary person. Those who have global permissions as "tutor" or "lecturer" can be registered as substitutes. If a person registered as lecturer defines the standard substitute, he or she will also be automatically be added to the course as substitute. However, the list can also be manually edited. Users cannot simultaneously be lecturer and substitute; if one is registered as lecturer, the entry as substitute will be removed and visa versa. But simultaneous entry as tutor and substitute is possible so that a person can externally appear as a tutor, but have more permissions internally 3. Tutors You can select your assistants here. Tutors have permissions similar to those of the lecturers in courses; they can therefore, for example, upload references, prepare schedules, etc. However they cannot change basic course data such as “lecturers” — only you as lecturer can do that. If there is to be more than one tutor, again press the CTRL key while you select several names from the list. Incidentally, only registered research assistants of your institution are on the list. You cannot designate students as tutors. If you have more than one tutor, here again press and hold the CTRL key while you select several names from the list with the mouse. 4. Fields of study (optional, only when the course is in the Teaching area). Please state the field of study in which your course best fits. You can select the areas in which you desire to give credit points. Scroll with the bar once through the entire list — all areas of all courses of study have been listed. You see the headings of the courses of study as heagings set off by equal signs — you should not select them. Now select the study areas which best apply to your course. If you desire to declare more than one, please proceed in exactly the same manner that you used in the selection of several participating institutes — by pressing the CTRL key. DescriptionsIn the last section you can change a few free entries: 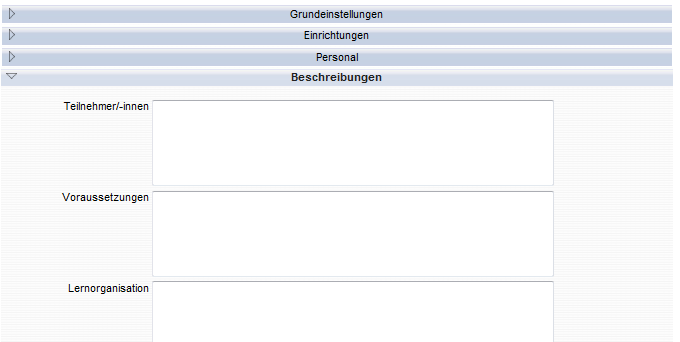 1. Participants specifies the target group, e.g., of students for whom the course was conceived - for example: social sciences or MuK, from the 3rd term (semester). 2. Prerequisites for participation in the course (for example: ). successful completion of the intermediate examination). 3. Learning organisation specifies how the course is to impart knowledge - for example, plenum with discussion. 4. Credit certificate What type of credit certificate can a student obtain in your course? (For example: Certificate of attendance, Graded performance record). 5. Data fields Depending on the settings which your admininstrators have activated, additional entries can appear here. These are termed “free data fields” according to the conventions in Stud.IP. However, they can look like the other fields mentioned above or checkboxes, selection boxes, etc. If you are not sure what you should enter in some of these fields, please contact your administrator. Of course, there may not be any data fields at this location in your installation of Stud.IP. 6. Other For example: Cell phones are not allowed in the course. Please briefly check the data you have input for correctness. If all entries are correct, click on the following button.  Thereupon, your changes of the course data will be stored. Bild ändernCourses can also be given avatars, i.e. small pictures, which are displayed on the Detail page, the My courses page and the Quick course search on the Header bar. These small pictures naturally, primarily have an aesthetic function, but it is also nice to have something on which you can visually orient yourself. 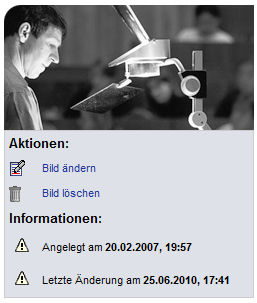 To change these avatars, click on "change picture“ in the Information box at the right and upload an image file on the next page. The changes should be visible immediately.
| ||
| |||