
|
|
Stud.IP Dokumentation
|
Editing filesYou can subsequently move, delete any file that you have uploaded into the system or edit the text in the file.  As lecturer or tutor you can edit all the files in your courses. As lecturer or tutor you can edit all the files in your courses.To edit a file, first open the folder in which the file is located. In our exemplary image it is the General folder . Then click once on the arrow next to the files description line. In the window that is now opening you see a description of the file and below it buttons with different options. You can perform the following actions on the file: 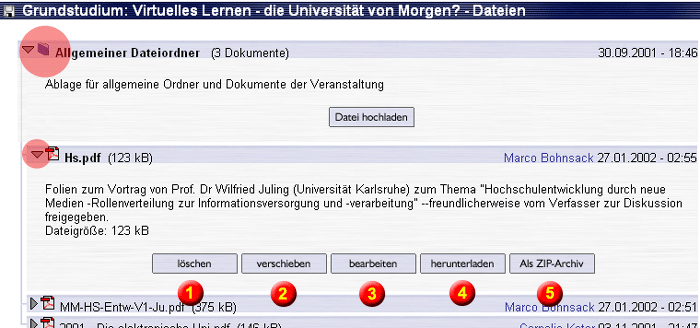 1. Delete it When you click on this button, you will again be asked whether you really want to delete the file.  If you now click on Yes, the file will be irrevocably deleted!  Irrevocably indeed also really means irrevocably. There is no Undo function. Once the file has been sent to the digital kingdom come, not even the system administrator can restore the file. Irrevocably indeed also really means irrevocably. There is no Undo function. Once the file has been sent to the digital kingdom come, not even the system administrator can restore the file.Therefore, consider very carefully what you are about to do. 2. Move it If you are an instructor or a tutor of a course, you can move files into any arbitrary folder of the course. To do this, move the cursor onto the Drag and Drop Icon  You can also change the sequence of the files with relation to one another with Drag & Drop, as you will quickly notice. Instead of dragging a file into a folder, simply drag it upwards or downwards in the file list and it will remain where you place it. In this way you can sort the files in the manner which you think is best (according to subject, age, alphabetical order, etc.). You can also move a file into a completely different course. To do this, press the Move button when the file is open. The following screen appears: 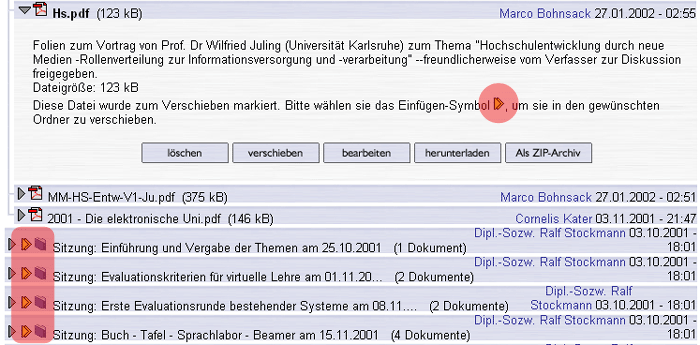

Next to the selection box, you will see a plus sign if your administrators allow this option. If you click on it, the selection box will be replaced by a larger one with which you can select several courses. Press on the plus sign next to the course name in the right-hand column to add the course to the list of courses into which it is to be copied; pressing on the minus sign in the left column again removes the name from this list. Only when you press on the yellow arrow or on "Copy/Move" will the Copy/Move action be performed. 3. Edit Click on this button to change the files explanatory notes. 4. Download A click on this button downloads the file to your computer. The file is then available offline and locally at any time, and you can do whatever you wish with it. 5. As ZIP archive The term ZIP archive or also zip(ped) file is derived from the name of a popular data compression programme. This programme can compress very large files to a very small size. Nothing is lost in the process. Since the file is smaller than it originally was, the downloading does not take as long. Click on this button to download a file in compressed form. It is indeed advisable to download the file as ZIP archive particularly for modem users: but you need an appropriate programme, such as. WinZip to unpack (= decompress) the file. Without this programme you cannot use the downloaded file.A ZIP programme is already integrated in the WindowsXP operating system.
| ||
| |||

 at the beginning of the file name and move the file with Drag & Drop upwards or downwards or into another folder. Folders which are closed should open when you move a file over them slowly.
 next to the other folders in this course.