
|
|
Stud.IP Dokumentation
|
< Polls and tests | Overview | Preparing tests > Preparing pollsSelect Prepare a new poll in …. You then access the following image: 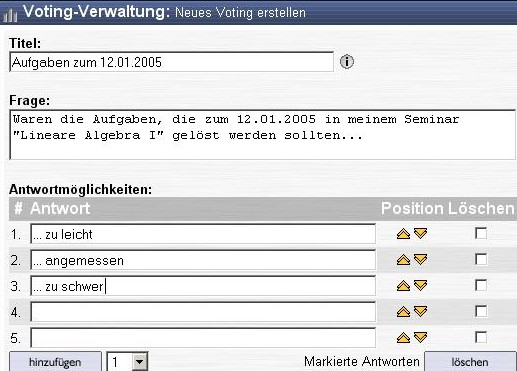 Here you have the opportunity of selecting a Title for the poll. This should not be too long and can, e.g., also contain only the topic of the poll in just one word. You do not have to give it a title, but it is appropriate and clearer for the other users if the poll is given a title. If you do not specify a title, it is automatically generated from the formulation of the question. Then enter the question, which should be at issue in this poll, in the Question field.
Now enter the different answer options. You can supplement them with any arbitrary number of response options. To do this, select the number of additional response options (up to 10) and click on Further down the page you then find the setting for the duration of the poll and its further properties: 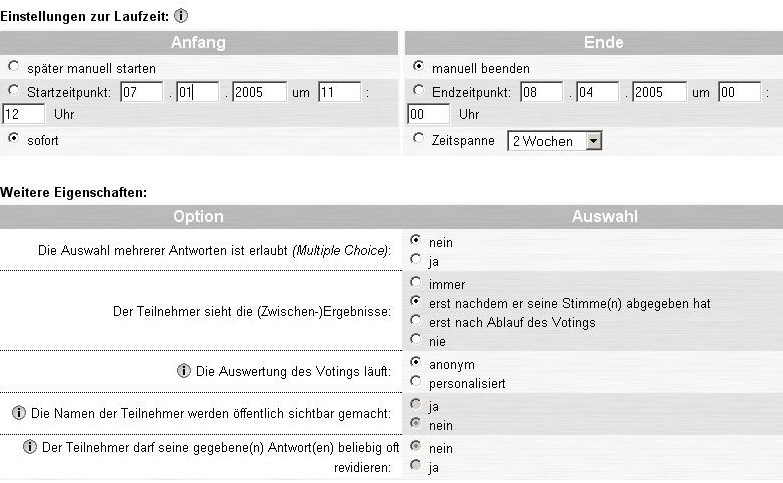 Beginning and end: You can start the poll immediately or enter a certain point in time when it is to be automatically started; similarly, you can determine the end of the poll manually or enter a point in time at which it then automatically ends. Further properties: In some polls it is expedient to make a Multiple choice poll, i.e. the poll participants can not only select just one answer, but instead can make several selections. Interim results: Here you can set when and whether other users can view the Interim results of the poll. The following options are possible:
The evaluation can be performed anonymously or in a personalised form. In a personalised evaluation you, as poll author, have the possibility of seeing who selected which response option(s): However, you should consider that this can result in fewer users participating in your poll. If the poll is evaluated in a personalised manner, you can make the names of those who voted publicly visible for all users of the system. This option is only possible when you set the evaluation to "personalised and when the results visibility has not been set to "never". If the participants may repeatedly retract their answers and vote again, enter "yes" in the last item of the additional properties. If everyone should only vote once and for all, select no here. This option is only possible if you have set the evaluation to personalised. Then press The following image again appears: The Poll administration with the message that the poll was set up. 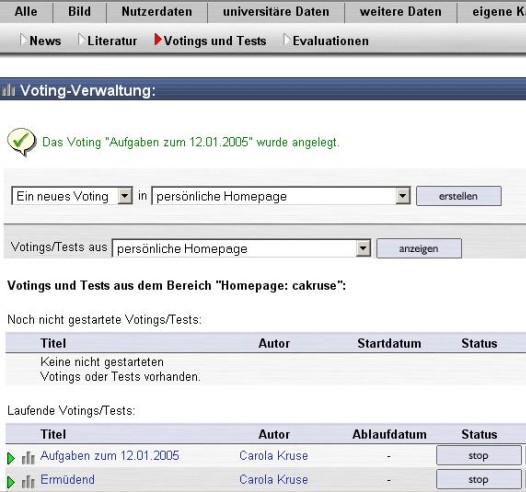 You can now view the poll attain by clicking on the title, but you can also stop it manually, reset it i.e. set it back to the initial state, edit it (only as long as no one has voted) or delete it completely. Even the polls and tests which have not yet begun are listed here.
| ||
| |||

 . This option can be repeated as often as desired, i.e. this means that you can enter innumerable additional response options. It is also possible to enter less than five response options, e.g. only three. To do this, one marks the redundant free fields on the right side under Delete with a checkmark and clicks on
  .
The position of the response options can be shifted up or down with the yellow arrows.
.
The position of the response options can be shifted up or down with the yellow arrows.
