|
|
Stud.IP Dokumentation
|
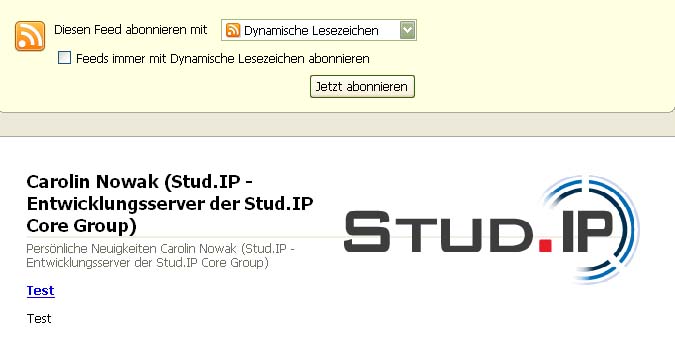
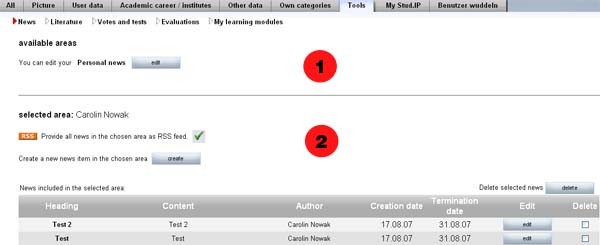
Course appointments, surveys and newsYour current course appointments and news are displayed in this lower area of your Start page.  The scheduled items can be both appointments in the courses you have enrolled in and appointments which you yourself have made. Below the news block you will find system-wide news dealing with the day-to-day operation of Stud.IP, e.g. information on new features, system downtime for maintenance purposes, etc. In the News and appointments section you will find system wide surveys in whiche your opinion is occassionally wanted. With a click on the red arrow RSS feedsOn the News bar and on your homepage, you also have the option of subscribing to RSS feeds (outlined in red in the upper figure). This means that news which is placed on Stud.IP is automatically downloaded onto your PC and made available to you via your browser (or another programme) without your having to log into Stud.IP. However, this feature is normally not available with older browser versions. a)Subscribing to RSS feedsIn order to subscribe to this function simply click on the –> You can use this feature by entering the URL. Below the marked area, the current news will always be displayed if you have subscribed to RSS feeds. In the box on the right side you can sort your news according to date or title (in alphabetical order). b) Accessing and reading RSS feedsTo read the news which has been downloaded via RSS onto your PC, click on the –> With it you are transferred to the Browser tab shown above and can now read your current news. c) Creating RSS feedsStud.IP also provides you with the option of offering your own RSS feeds. Thus, other Stud.IP users, or if you are an instructor, also participants in your course, can subscribe to your news as a feed. To create feeds, click on "Tools on the Tab bar on your personal homepage. You will see the following page: –>
With a click on the small red cross (outlined in red in the figure) you can offer the news in the area selected as RSS feed. To prepare further or new news, click on Create. You then move to the following page: –>
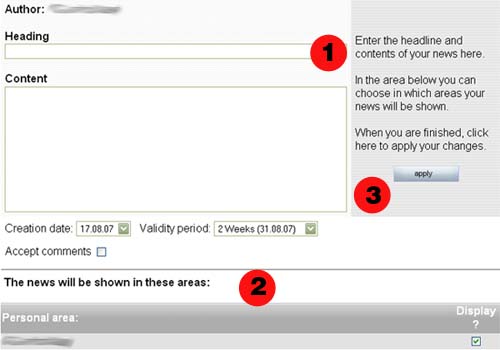
You are shown the same view as above, except that the news which you have written will be additionally listed. –> The green checkmark indicates that the news in the selected area can now be subscribed to as a feed. Thus, the RSS icon also appears on the overview page in the respective area. –>
| ||
| |||

 , (outlined in red in the figure) the entire text of the news, of the poll or of the appointment is displayed.
 icon to the right of the News bar or go to the "My Stud.IP" menu item on your homepage and click on RSS feeds there.